
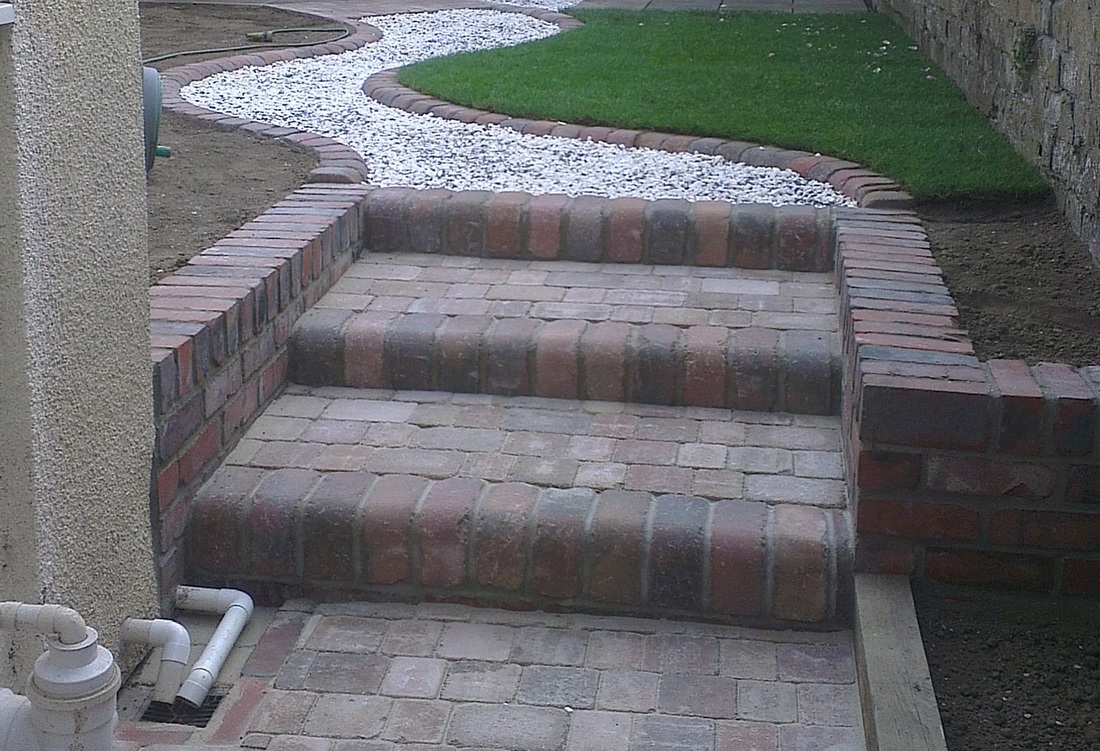
 | Before we get started you should be warned that this is the most advanced of my ‘how to’ guides so far and probably should not be attempted by anyone without some basic experience. Having said this there is only one way to learn and if you are up for a challenge then constructing garden steps can be extremely rewarding. The steps constructed in this example are constructed using reclaimed bricks for the side walls, ‘bull nosed’ bricks for the facing and matching block pavers for the treads. The same basic principles can be used for any steps and so this guide should be adapted to fit your own needs. |
| Tools required: Trowel and lump hammer Wheelbarrow Cement mixer Shovel Spirit levels Cutting tool such as angle grinder | Materials required: Ballast Cement Sand Concrete blocks Facing material if required (e.g. bricks) Material for treads (e.g. pavers or slabs) |
STAGE 1 - EXCAVATION
First of all you will need to dig out the area where the steps are going to be constructed. As you can see from the image below you will need to excavate out the entire area to the depth of the base of the steps. This is necessary as a block retaining wall will need to be built around the perimeter of the steps to provide strength and prevent the weight of the raised area creating any problems over time.
You will need to take into account the thickness of the concrete blocks (generally 4 inches) when excavating to ensure there is sufficient room for any walling materials you will use.
STAGE 2 - FOOTINGS
In order to prevent the concrete blocks from subsiding you will need a solid base for them to be built upon. Dig a trench down beneath where the blocks will sit, wide enough to accommodate the blocks themselves plus any walling bricks (if used) plus at least an inch or two either side. For most steps a depth of 25cm should be sufficient.
Now to lay the concrete footings. Make a ballast and cement mix (around 5:1 ratio) and pour into the trench. The finished height of the concrete needs to be level and slightly below the base of the steps. Use the edge of a straight timber board to work the concrete around to achieve a flat surface. Use a spirit level on top of the timber to check the level. You will probably need to redistribute a little of the concrete around before repeating the process and achieving a level footing.
| STAGE 3 - BLOCKWORK If the concrete blocks are to be faced with walling bricks or stone (as in this example), then the blocks can generally be laid on edge as the bricks/stone will provide additional mass and support. If the blocks are to be left exposed or rendered then it is probably advisable to lay them on flat for additional strength. The blocks should be laid on a sand and cement mortar mix (around 5:1 ratio) using a trowel and making adjustments with a spirit level and lump hammer. | 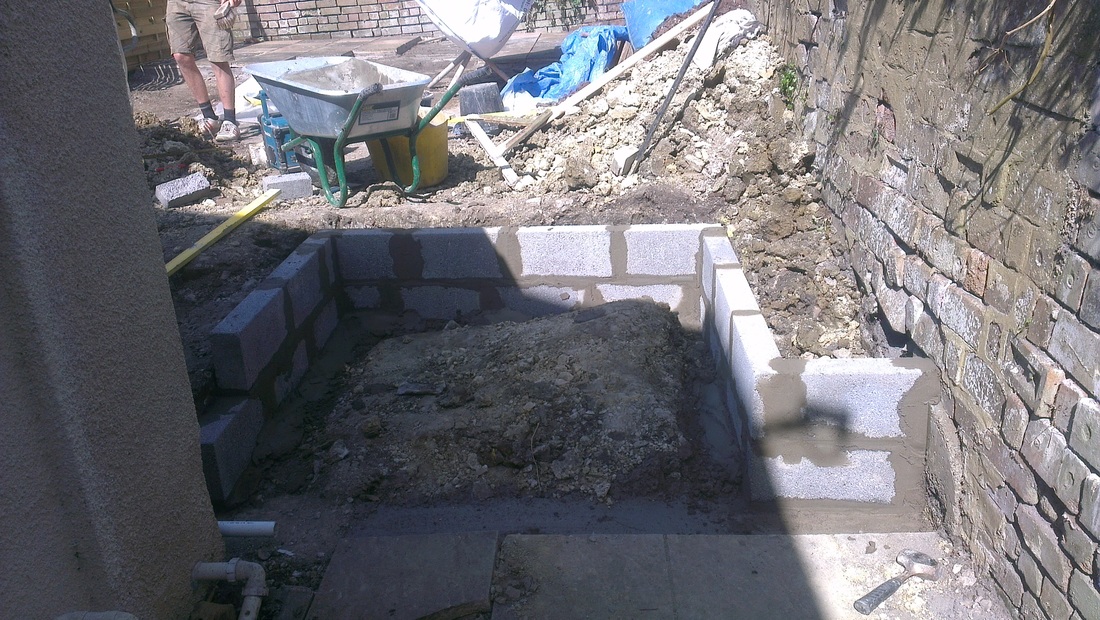 |
First of all the outside perimeter of the steps should be defined with blocks as shown in the picture above. It is often a good idea to also install blockwork across for each individual step. In this example, however, the steps are not retaining a great deal and the large bull nosed bricks are sufficient on their own.
| STAGE 4 - BRICKWORK (SIDES AND FACES) The side walls should be faced first taking into account that not all the side walls will be visible as the steps themselves are installed. Next up are the step faces themselves. In this example we are building them up solely with reclaimed bricks and bull nosed bricks. It may be that you already have blockwork in place to work off. | 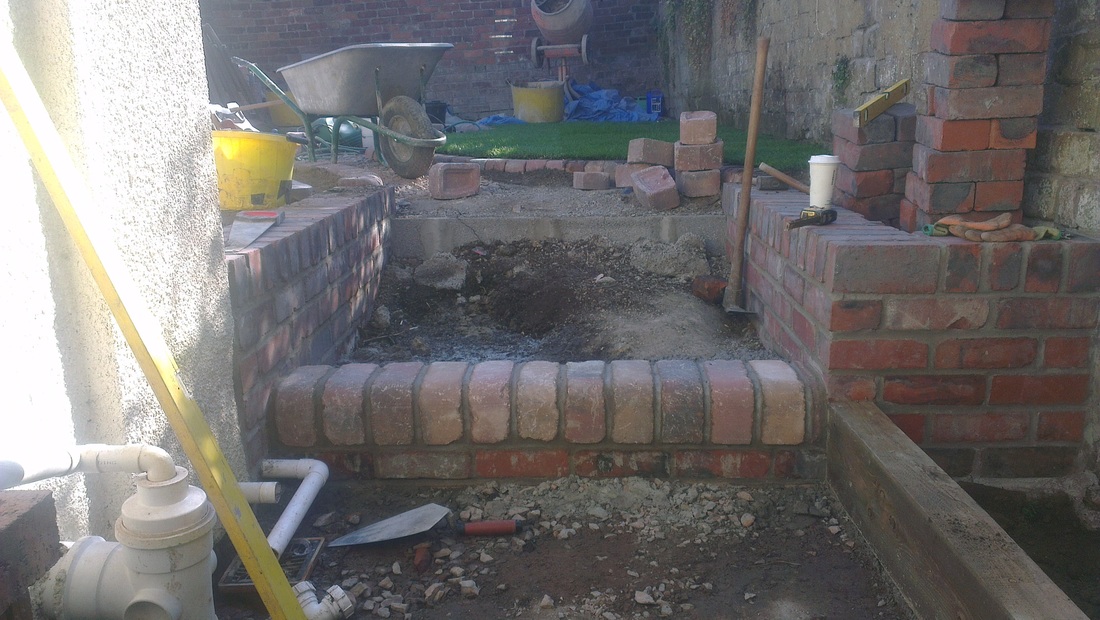 |
As with the blockwork a mortar mix should be used to set the bricks in place. More care needs to be taken here to get the mortar consistency right. Soft enough to provide adequate adhesion whilst not being so thin as to make a mess and stain the bricks.
Before setting each brick in place a bed should be prepared for it to sit on and one side 'buttered' with mortar using a trowel to allow it to bind to the previous brick. Unless you are experienced with brickwork you will probably need to top up the joints with additional mortar. Once the mortar has set to some extent (normally between 1 and 4 hours time) you can use the handle of the trowel to tidy up the mortar joints.
Before setting each brick in place a bed should be prepared for it to sit on and one side 'buttered' with mortar using a trowel to allow it to bind to the previous brick. Unless you are experienced with brickwork you will probably need to top up the joints with additional mortar. Once the mortar has set to some extent (normally between 1 and 4 hours time) you can use the handle of the trowel to tidy up the mortar joints.
| STAGE 5 - BLOCKWORK (TREADS) With the difficult part done your attention now turns to the step treads. In this example we simply laid matching block pavers on a compacted bed of sand, cutting them down to size to make a tight fit and then filling any voids with fine 'kiln dried' sand. And that's it, all done! | 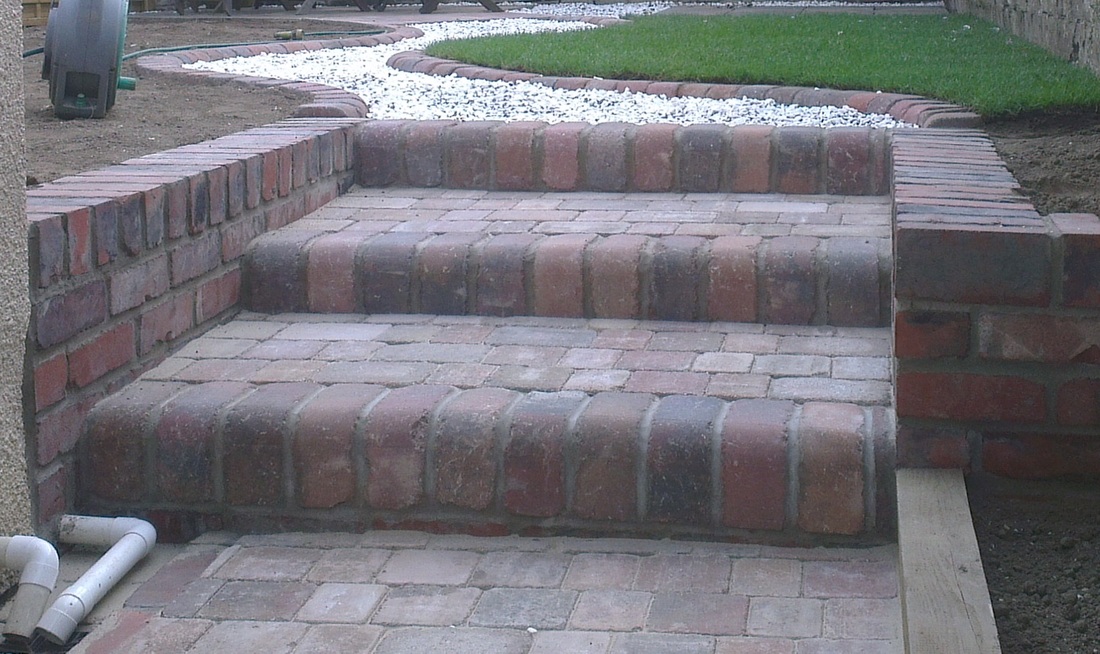 |
 RSS Feed